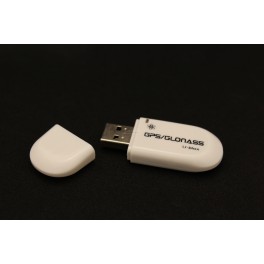
The page for this device says it is Raspberry Pi compatible. I can see that. The device would show up on any system running Linux, and that means the USB ID. But how to configure a Raspberry Pi so that the running software sees it? That\'s the question.
Start with a fresh download of Buster and do the usual sudo update/upgrade to get the latest patches.
1 — Install the following software:
sudo apt -y install gpsd gpsd-clients python-gps chrony python-gi-cairo
2 — Next step is to make some changes to the gpsd configuration file as follows:
sudo nano /etc/default/gpsd
3 — In the file that opens, add or amend lines to make sure the following is present:
START_DAEMON=”true”
USBAUTO=”true”
DEVICES=”/dev/ttyACM0″
GPSD_OPTIONS=”-n”
Hit ctl-x followed by y to close and save the file.
4 — Reboot the Pi and check that the following services are active:
systemctl is-active gpsd
systemctl is-active chronyd
5 — You can use any of the following three commands to check that the GPS is visible and delivering NMEA words. NB: Most GPS dongles will show a flashing LED when they have a fix:
cgps – s or gpsmon -n or xgps
6 — Next, we need to make a change to the chrony configuration file:
sudo nano /etc/chrony/chrony.conf
Add the following line to the end of the file:
refclock SHM 0 offset 0.5 delay 0.2 refid NMEA
Hit ctl-x followed by y to close and save the file.
7 — You can now check chrony’s sources with the command:
chronyc sources -v
If you are connected to the network, you will see a list of available time servers plus the GPS source which will be shown as NMEA. If you’re not network connected, you will just see the NMEA source listed. The two punctuation characters immediately before NMEA, indicate its status and you need to see #* where # means thge GPS is recognised as a local clock and * means that it’s being used to synchronise the Pi system time.
8 — You can now use chronyc to provide a more detailed view using the command:
sudo chronyc tracking.
This will confirm that NMEA is being used as the reference and will list the time difference between the reference and the system clock. To avoid clock jitter that can cause lots of software problems, chrony slowly changes the system clock until it matches the reference. However, this makes for a very slow synchronisation.
9 — If you want to quickly synchronise the time, use the following command to make a step change to the system clock:
sudo chronyc makestep
Operational Notes
If you boot the Pi with a network connection, chrony will automatically sync to the time server with the shortest propagation delay. If you remove the network connection after boot, it will take a while for chrony to switch back from the network server to the local GPS. This is because Chrony makes repeated attempts to reach what it considers to be the best timeserver. The simplest way to overcome this delay is to reboot the Pi without a network connection. It will immediately revert to using the NMEA (GPS) data as it’s the only timing source available.
NB: Pi Pixel Clock Update Delay – Please note that the PIXEL desktop clock (top right corner) only synchronises with the system time every 5 minutes. As a result, updates to the system time can take up to 5 minutes to permeate to the desktop clock! The most reliable way to check the system time is to use: sudo timedatectl. This shows all the vital timing detail and synchronisation with GPS USB dongle is indicated when the ‘NTP Synchronized’ entry reports yes.
Here are some useful time-related commands:
sudo date -s “Aug 7 09:15” – Manually sets the system time and is useful when testing RTC and GPS units.
sudo hwclock -w – This command updates the RTC with the current system time. Use this when you are connected to a network and want to force the RTC to sync with network/system time.
sudo hwclock -r – This displays the current RTC time and is useful for checking the RTC.
sudo hwclock – s -Sets the system time from the RTC
sudo hwclock –set –date ”8/11/18 15:24:00” Manually sets the RTC time and date – useful for testing.
sudo timedatectl – Displays the status of all the Pi clock sources.
sudo chronyc makestep – Forces the system time to make a step change to the reference time, i.e. GPS. This avoids the time lag caused by chrony incrementally adjusting the clock.
 Gregg ·
 07/26/2021
 Maximize
 Maximize