Categories

Newsletter

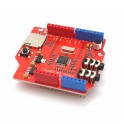
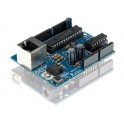
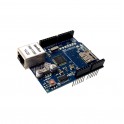
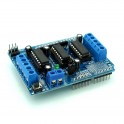
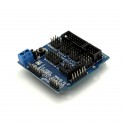
MIDI Shield for Arduino

Send or recieve MIDI signals from your Arduino board using this MIDI Shield. Fits directly on top of the board, fully assembled, no extra wiring necessary.

More details

Availability: SHIPS TODAY

Last Updated: 03/19/2024

Tinkersphere

TA1281

$18.99

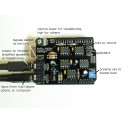
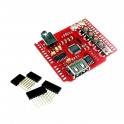
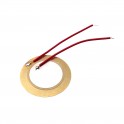
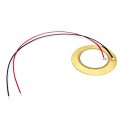
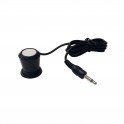
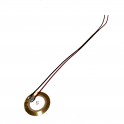
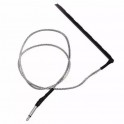
With the MIDI shield, you can add the power of the MIDI protocol to your Arduino projects. MIDI protocol and asynchronous serial interface has many similarities, so users can use the micro-controller UART pin to send MIDI event information. This is a MIDI shield which allows Arduino like boards to receive and send MIDI messages. The shield allows direct wiring of up to 5 piezzo sensors and a keyboard (with buttons and serial resistors) making it ideal for drums projects.

  • Connections:
    • MIDI - IN
    • MIDI - OUT
    • MIDI THRU
  • Can be installed directly on top of the Arduino board
  • MIDI-IN, MIDI-OUT and MIDI-THRU connectors
  • 5 Piezzo sensors can be connected to the solder points at the edge of the shield for drum implementation
  • Keyboard for piano implementation
  • Works with the Arduino MIDI library
  • Works with both 3.3V and 5V Arduino-like boards
  • Connects MIDI - IN/THRU to Arduino hardware RX pin, connects MIDI - OUT to TX.
  • The onboard switch lets you program the board without having to remove the shield by flicking the switch to OFF when you want to program. This is useful because the MIDI code uses the same pins that the Arduino uses for serial communications which are needed to program the board.
  • Comes fully assembled and soldered
  • Dimensions: 5.74 x 5.31cm


Sample Arduino Code:

/*
 MIDI note player
 
 This sketch shows how to use the serial transmit pin (pin 1) to send MIDI note data.
 If this circuit is connected to a MIDI synth, it will play 
 the notes F#-0 (0x1E) to F#-5 (0x5A) in sequence.
 
 The circuit:
 * digital in 1 connected to MIDI jack pin 5
 * MIDI jack pin 2 connected to ground
 * MIDI jack pin 4 connected to +5V through 220-ohm resistor
 Attach a MIDI cable to the jack, then to a MIDI synth, and play music. 
 */

void setup() {
  //  Set MIDI baud rate:
  Serial.begin(31250);
}

void loop() {
  // play notes from F#-0 (0x1E) to F#-5 (0x5A):
  for (int note = 0x1E; note < 0x5A; note ++) {
    //Note on channel 1 (0x90), some note value (note), middle velocity (0x45):
    noteOn(0x90, note, 0x45);
    delay(100);
    //Note on channel 1 (0x90), some note value (note), silent velocity (0x00):
    noteOn(0x90, note, 0x00);   
    delay(100);
  }
}

//  plays a MIDI note.  Doesn't check to see that
//  cmd is greater than 127, or that data values are  less than 127:
void noteOn(int cmd, int pitch, int velocity) {
  Serial.write(cmd);
  Serial.write(pitch);
  Serial.write(velocity);
}

Doc says that MIDI THRU jack is connected to RX pin on Arduino and also to incoming signal/data line from MIDI IN jack.

So can I just listen to MIDI messages on the THRU jack? Or do I need to manually relay them? Do I need to call MIDI library function "turnThruOn()"?

Thanks for any feedback. Don\'t want to damage my Tinkersphere MIDI shield. It works GREAT!. I just want to distribute each message to two Arduinos for simultaneous independent processing.
Yes, MIDI THRU is used to share the data from MIDI IN to other devices. MIDI THRU allows many MIDI devices to have their MIDI connections daisy chained together. These shields are really good. I like them too. Have fun my friend.
Default User Icon Stephen · 08/13/2021
Was this answer helpful? (0) (1)
is there a pinout for this board?
Digital in 1 connected to MIDI jack pin 5, MIDI jack pin 2 connected to ground, MIDI jack pin 4 connected to 5V through 220-ohm resistor.
Attach a MIDI cable to the jack, then to a MIDI synth, and play music. Here is the pinout: https://tinkersphere.com/10693-thickbox_default/midi-shield-for-arduino.jpg
Default User Icon Ben · 01/27/2023
Was this answer helpful? (0) (0)
Is it possible to change the Serial port that the MIDI shield uses? I have this installed on an Arduino Mega, and would like to retain access to the hardwareSerial port for debugging while it is in use. -- Tried to just put only have the shield on (the side that has power, and then jumper RX0/TX0 to RX2/TX2 on the board.... but I am not getting anything.
Use softwareSerial for debugging and this shield will use hardwareSerial\'s pins. You may also consider using a multiplexer to switch between the serial devices if you can get the timing to only have one sending / receiving at a time. https://tinkersphere.com/ics/1426-analog-digital-mux-breakout-cd74hc4067.html
Default User Icon Russell · 01/28/2023
Was this answer helpful? (0) (0)