Categories

Newsletter

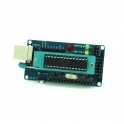
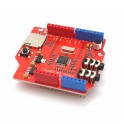
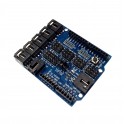
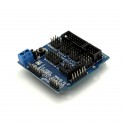
ATmega328 Chip & Board Programmer Shield Bootloader Burning Tool

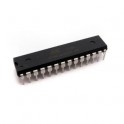
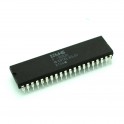
Burn the Arduino bootloader and program bare ATmega328 chips directly and quickly using this ATmega328P Programmer Shield with ZIF socket for quickly popping chips in/out for programming. Also burns and programs Arduino boards via ISP pins! Buzzer and LED indicator too!

More details

Availability: Ships 4/29/2024

Last Updated: 04/28/2024

Tinkersphere

TS3913

$12.99

Features:

  • ATmega328 Chip Programmer Shield Bootloader Burning Tool
  • Place the shield above Arduino UNO, Mega or other Arduino boards.
  • Allows your board to modify the fuse bits and burn the bootloader onto bare ATmega chips or other Arduino boards.
  • On-board buzzer and LED indicators, indicating whether the burning was successful
  • Convenient for board designers to burn for Arduino in batches.
  • Uses SPI pins of ICSP interface so it's compatible with Arduino.
  • It can change to the bootloader burner when it is directly plugged onto the two boards.
  • Operating voltage: 5V
  • Operating current: 500mA (max)
  • Chips / Boards that can be burned with this Shield: bare ATmega chips, UNO R3 / Mega2560 / Nano / pro mini (5V 16M)
  • On-board buzzer, if the fuse bit is successfully modified, it will sound once, and then if burning bootloader is OK, it will sound once again. If there are not two beeps, burning has failed. You can listen for the sound instead of LED lights, so this will improve the efficiency of burning in bulk.
  • On-board LED indicators, HEART BEAT led pulses when powered normally. During programming, the PROG indicator flashes until it finishes. If the programming is unsuccessful, the ERROR indicator (red) will light.
  • Onboard 28P locking seat for Atmega328P, Atmega168P, Atmega8 bootloader burning
  • Onboard ISP_6PIN interface, for the external board bootloader burning for Arduino boards via ISP pins.
  • On-board ISP_10PIN interface
  • On-board FT232RL and CH340G USB to TTL programmer interface for uploading code to the chip on the 28P locking seat.

Usage instructions:

  1. Place on top of your Arduino UNO, Mega or other Arduino board with similar footprint
  2. Connect to your computer
  3. Open the Arduino IDE
  4. Then select the File >> Examples >> ArduinoISP sketch and upload it to your Arduino.
  5. Make the connections:
    • For chips: Place the chip you'd like to program into the locking blue ZIF slot with the notch on the side with the lever and lock into position as shown in the image above.
    • For boards: Connect an ISP cable to the Arduino board you'd like to burn the bootloader to as shown in the image above.
  6. Select Tools >> Burn Bootloader


Useful video tutorial: https://www.youtube.com/watch?v=-DX-ahFv1aE

No customers have asked questions about this product yet.