Categories

Newsletter

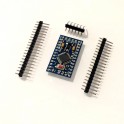
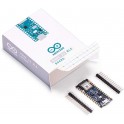
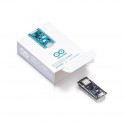
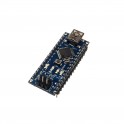
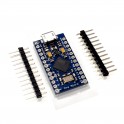
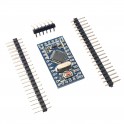
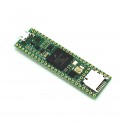
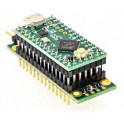
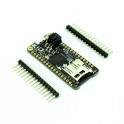
Pro Micro 3.3V/8MHz Arduino Compatible Atmega32U4 Breakout

Save energy with this 3.3V Pro Micro Atmega32U4 Breakout Board! Arduino Compatible so all your Arduino programs will run just the same in a tiny 3.3V form factor! Plug in a microUSB cable and you're good to go! Replaces Arduino Leonardo.

More details

Availability: SHIPS TODAY

Last Updated: 03/29/2024

Tinkersphere

TS-876

$17.90

This Pro Micro Breakout Board is a great alternative to an Arduino UNO in your projects. Just solder on the header pins and pop onto a breadboard or solder directly into your projects to save space! Power using a 5V-12V power supply or via microUSB and that's it! Wire into your circuit using the pin diagram in the images above and plug into your computer's USB port to program! We love this little Arduino Compatible board because it is so much smaller than a standard Arduino UNO which makes it much better for placing into finished projects than a clunky UNO board.

Features:

  • Our Second Smallest Arduino-Compatible Board! (Smallest is the ATtiny85 Breakout Board with 6 I/O pins)
  • Now running at 3.3V for additional Power Saving and Raspberry Pi Compatibility
  • ATmega32U4 running at 3.3V/8MHz
  • 8-bit with 32K bytes of ISP Flash
  • Supported in the Arduino Programming Software (IDE) v1.0.1
  • microUSB connector onboard for programming
  • 4 10-bit ADC pins
  • 12 Digital I/Os (5 are PWM capable)
  • Rx and Tx Hardware Serial Connections
  • Supports unregulated Power Supplies up to 12V via the RAW pin.


Specifications:

  • Main Chip: Atmega32u4
  • MicroUSB connector on board 
  • Input Power Supply: Accepts 5V - 12V on the RAW pin for powering the board
  • Operating Voltage: 3.3V (same as Raspberry Pi boards)
  • Frequency: 8Mhz
  • Comprable to the Teensy 2.0, Arduino Micro and other 3.3V Atmega32u4 Breakouts
  • When Programming via Arduino IDE, be sure to select board type: Arduino Leonardo


Initial Setup:

  • Plug your microUSB Cable into your Computer
  • Connect the microUSB Cable to your Pro Micro
  • Download this test sketch
  • Open sketch in the Arduino IDE
  • In the Arduino IDE select Tools->Board->Leonardo
  • Click the Checkmark button on the top menu to verify the test code
  • Click the Arrow button to upload to your Pro Micro
  • You should now see your Pro Micro's Green and Yellow LEDs blink alternately.
No customers have asked questions about this product yet.

Customers who bought this item also bought